
Happy St. Patrick’s Day
Hey y’all! This is Kim with @KGDesigns_AL. Today, I’m bringing you a paper piecing project for St. Patrick’s Day using Maymay Made It’s stamp set, Suit Up.
Supplies needed:
• White card base: 8.5”x5.5” piece of white card stock scored down the middle at 4.25”
• One piece of gold glitter card stock that measures 4”x5.25”
• One piece of black card stock that measures 3.75”x5”
• Scraps of cardstock in white, black, green glitter, and gold glitter
• Suit Up stamp set
• Versa Fine Black Onyx Ink
• Darice Embossing Folder – Multi Lines
• Scotch Double Sided Foam Mounting Tape
• Art Glitter Glue
• Cricut Paper Trimmer
• Score Board
• ½” circle punch
1. On the stamp set, locate the suit lapel and shirt stamp. Stamp it on the back of a piece of green glitter paper. Stamp the suit lapel again on a scrap piece of white card stock.

2. On the back of a scrap of gold glitter card stock, stamp the bow tie twice.

3. Stamp the front pocket onto a scrap piece of black cardstock and on the back of a piece of green glitter cardstock
4. Emboss the white piece that has the suit shirt & lapel stamped on it.
5. Fussy cut just the lapel portion of the green glitter card stock. Fussy cut the portion of the white embossed cardstock leaving a margin to the outside of the “shirt” to glue to the lapels.

6. Fussy cut the entire bow tie from one and the knot portion of the other bow tie that was stamped on the gold glitter
7. Fussy cut the entire pocket from the black cardstock and just the top of the pocket from the green glitter cardstock
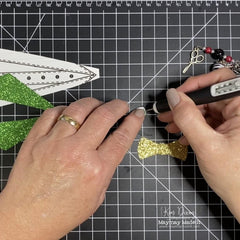
8. Take a black marker and run around the edges of your glitter pieces to give them some dimension.

9. Glue the green pocket piece to the top of the black pocket piece from step 7.
10. Adhere the bow tie knot to the bow tie with a small piece of Scotch Double Sided Foam Mounting Tape.
11. Adhere the shirt placket the green lapel section from step 1 with AGG.
12. Adhere the bow tie to the shirt.
13. Punch out 3 circles with the ½” circle punch from gold glitter card stock.

14. Adhere the pocket to the bottom right section of the black card mat. Adhere the 3 ½” circles to the pocket top as if they are coins falling out of the pocket.
15. Adhere the Lapel/shirt to the top center of the black card mat.
16. Adhere the black card mat to the gold card mat using AGG.
17. Adhere the entire card to your card base using AGG.

Thanks for stopping by today. I hope you enjoyed the project!