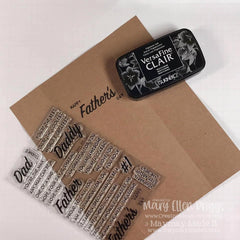
Cutting Guide:
Kraft cardstock cut at 7 3/8 x 8 1/2
White cardstock cut at 3 5/8x 6 7/8
Black cardstock cut at 2 x 1 1/2
Assembly instructions:
—Start by stamping the tools from the Nailed It stamp set.
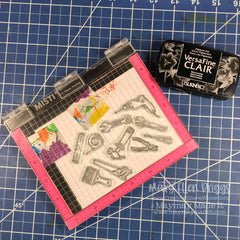
—Next color the tools with colored pencils.Once done with coloring, bring out the Baby Oil and Pencil Coloring Tool. Use the tool to soak up the baby oil then use it as a pencil and color over the tools. Set aside until needed.
—Move onto the card base. Which is the Kraft cardstock cut at 7 3/8 x 8 1/2. Score the cardstock at 2 1/8 and 7 1/2.
—When that part is done. You can now bring out the Salvaged Patina ink and Patina stamp set and stamp all over using the Fiskars Stamp Block Set.After stamping spray a little water to activate the Oxide ink. Then dry it off with some kitchen towel.
—Now move onto the White cardstock which is cut at 3 5/8x 6 7/8. And score it at 1/2 and inch on both sides. Then move the cardstock to the 2 inch mark on the Scoreboard. And score at the 3 1/2 and 4 inch marks. Repeat the is step on the opposite side.
—When you are done with that part. Bring out the Crackling Campfire and Weathered Wood inks. Swipe them onto the white cardstock.
—Next bring out the Sharpie and T-square. And draw horizontal straight lines.Then do vertical lines staggering where those lines are. This will help create the illusion of wood paneling.
—Now bring back those colored tools and fussy cut them.After that you will bring the Sharpie out so you can color around the edge of the tools.
—When that is done. You will bring out the wood paneling piece and using the Bearly Art Precision Craft Glue attach the tools onto the cardstock piece.
—Once the tools are all on the wood paneling piece bring out the Elizabeth Craft Double Sided Adhesive Tape. Place the tape on the ends of the piece which is the 1/2 inch mark on both sides.
—Now take the black cardstock and stamp a sentiment using the MISTI and VersaMark Watermark. Next bring out some white embossing powder and your heat gun and emboss the sentiment.
—When that is done bring out the Crop-A-Dile Corner Chomper and use it on all 4 sides of the cardstock….after that bring out the Brutus Monroe Pigment Ink Alabaster White and a finger dauber… create a chalkboard looking image
—Then attach the cardstock to the front of the gatefold card. But only apply adhesive to one side of the gate piece.
—Now use the MISTI stamp Happy Father's Day inside the card using the Best Dad stamp set ,stamp the front of the card using nail stamps from the Nailed It stamp set ….To complete the card stamp with Salvaged Patina ink and Patina stamp set on the front of the card.