
Hi friends, Gina here bringing you a mini wedding brag book. This easy album is an elegant way to hold some of those tender moments from a special day.
Supplies:
1 – 12X12” cardstock
Paper trimmer
8 – 5.5 X 5.5” Mintay Precious Moment
Silver embossing powder
embossing ink
Speckled Egg Distress Oxide ink
Ink blender
Scripture Sentiments stamp set
His & Hers stamp set
Adhesive foam
Nuvo Aqua Shimmer
Ribbon (approx. 30”)
Instructions:
1. Cut 12X12” cardstock into two 12” X 5.75” pieces. Score both at 5.75” and 6.25” to create a .5” spine.

2. Cover each page with a 5.5” X 5.5” piece of patterned paper with edges inked. Use same pattern on adjacent pages to create a spread. Emboss various images and sentiments from “His & Hers” on pages. Fussy cut images from the paper pack. Ink edges and adhere with foam adhesive.

Cover:
1. Cut a piece of blue/grey cardstock to 5.625” X 5.625”. Adhere to front cover.
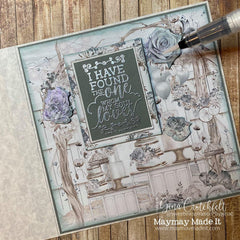
2. Cut scene with cake to 5.5” X 5.5”. Ink edges. Layer on top of blue/grey cardstock on cover.P

3. Stamp & emboss sentiment from “Scripture Sentiments “ with silver embossing powder on grey/blue cardstock.

4. Trim to fit on frame on back inside cover of paper pack. Trim so that flower border is even on all sides. Ink edges and adhere to cover using adhesive foam.

5. Using a duplicate page, fussy cut flowers and adhere with foam adhesive. Brush Nuvo Aqua Shimmer over flowers.
6. Cut patterned paper 5.5” X 5.5”. Ink edges and adhere to back cover.
7. Cut blue/grey cardstock 5.625” X .875”. Emboss sentiment from “His & Her” and adhere to outside spine.
Book Construction:
1. Holding both pieces of 12” X 5.75”flat, one on top of each other in correct order, punch 2 holes on spine, each about .75” from edge.

2. From inside, run ribbon through each hole so that ends meet on the outside to tie a bow.

3. Flip book over and tie ribbon into a bow. Trim excess off edges.
