
Mini Craft Outfitting™ by Sandpaper Road Created for Maymay Made It - Coordinates with "Brewtiful" Stamp and Die Set

Make 5 cards in ONE SITTING with only a few supplies! No guessing or complicated sketch to follow. No pre-cut card bases. No cut-apart. Just easy instructions and your creative ability (which is better than you think)! Give it a try!
Supplies Needed:
Double-sided paper pack (6" x 6")
3 pieces (8-1/2" x 11") heavyweight white cardstock
Ink for stamping
Scissors
Paper trimmer
Liquid adhesive
Sticky tape
Acrylic stamping blocks
Distress Ink
Ink blending tool
Mini blending tool (or cotton swabs)
Optional, but nice to have:
Corner rounder
Stamping positioning tool/platform
Double-sided foam tape/fun foam
Mini sticky notes
paper clips
small dish, tray or yogurt container for small pieces
Watch the complete video tutorial HERE:
1. Use the Sandpaper Road Formula™ to choose 6 sheets of patterned paper from the pack. The Sandpaper Road Formula™ is as follows:
2 of the "same"
2 "differents-plain"
2 "off the chain"
To choose these patterns, look mainly at ONE side of the paper. Choose 2 patterns that are the same. For best results for this pattern, choose a "light" to "medium-light" color tone for the 2 "sames".

Then, choose one pattern that is different from the "same" pattern, and relatively "plain". With a pencil or sticky note, label that piece "DP-1".


Then, choose another pattern that is different from DP-1, but also is relatively plain. With a pencil or sticky note, label that piece "DP-2". NOTE: Whatever you choose for DP-2 for this pattern should be able to be stamped on (no glitter paper or textured paper). After that, choose a crazy-busy pattern (a pattern that is totally off the chain!) and label it "OC-1". Finally, choose another crazy-busy pattern that is different from OC-1. Label that piece "OC-2".

After you have chosen 6 sheets of patterned paper according to the Sandpaper Road Formula™, look back through the patterned paperback (both sides) and choose ONE mainly-solid LIGHT-COLORED sheet and ONE mainly-solid DARK-COLORED sheet. You may find it helpful to label your light and dark sheets "light" and "dark", since the sheets are double-sided. Set the patterned paper aside.

2. Gather the 3 pieces white heavyweight cardstock (sized 8-1/2" x 11"). Cut each piece in half, vertically at the 4-1/4" mark. Set ONE of these halves off to the side.

Score and fold the remaining 5 halves at the 5-1/2" mark. You should end up with 5 top-folding, A2-sized card bases. Now, CUT the remaining unfolded white piece in half at the 5-1/2" mark. Set ONE of those halves aside. CUT the last white piece into a panel measuring 5-1/4" x 4". Label the back of this piece with the letter "P" (so you remember this is the pre-cut PANEL). Move on to step 3.

3. Locate OC-1, DP-1 and the "heart" die. Cut OC-1 in half at the 3" mark. Then, cut ONE of the 3" x 6" pieces in half at the 3" mark. With a corner rounder, round all 4 corners on BOTH of the two 3" x 3" squares.

Use the "heart" die to cut 8 heart shapes out of the remaining piece 3" x 6" piece of OC-1. DO NOT USE THE COORDINATING STAMP... just die cut. As you arrange the die for cutting, be mindful of the heart-shaped pattern you are making with the negative space. Keep small heart-shapes in a dish, tray or yogurt container as you work.

Use liquid adhesive to adhere the negative space in the center of DP-1.

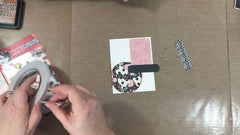
Use the roll of Maymay tape to TRACE the inside circle of the tape onto the CENTER BACK of DP-1. Cut out with scissors. If desired, ink the edges of the circle with Distress Ink and blending tool.


Use the Maymay tape to adhere the circle to the bottom left of the white card panel labeled "P". If there is a "line" on the circle, line up that "line" with the edge of the card panel and trim off the excess. Set aside.

4. Locate one of the "same" pieces, one of the 3" x 3" rounded squares, a card base and the remaining scrap of DP-1. Cut the "same" at the 4" mark. Then, turn that 4" x 6" piece and cut again at the 5-1/4" mark.

Adhere this panel to the card base with Maymay tape. Find a "good" edge of DP-1 and cut a 1" wide strip. Use scissors to "notch" one end of the strip. Ink the edges of the notched strip, if desired. Find another "good" edge of DP-1. Cut a 1" wide strip.

Use scissors to notch one end of the strip. Ink the edges of the notched strip, if desired. If you can get another 1" wide strip out of DP-1, do so. Then, discard the remainder of DP-1. Adhere the 3" x 3" square in the upper-right portion of the card, on top of the "same" panel. Adhere one of the notched strips vertically over top of the 3" x 3" square, in the upper-right portion of the card.

Trim off any excess of the notched strip. With a blending tool and Distress Ink, ink the outside edges of the entire card. Set aside.
5. Locate the piece of "dark" paper, 2 strips of "same, the 1" wide strips of DP-1, the other 3" x 3" rounded square and a card base. Cut a 4" x 5-1/4" panel from the dark paper.

Trim down the remaining dark strips to 3" long and round the corners. Discard the remaining teeny-tiny dark cardstock scraps. Set aside.


Use Maymay tape to adhere the strips of "same" and DP-1 to the dark panel (experiment with the look of the front and back patterns of the strips). Trim off excess.

Adhere the 3" x 3" rounded square in a diamond shape on top of the strips. Adhere the panel to the card base. Set aside this card for now.

6. Now, it's time to do some stamping! Locate your stamps, stamping ink and stamp positioner (or acrylic block). Also, locate one of the "same" pieces. Stamp a teacup in the upper left corner of the "same" piece (leaving about a 1/4" margin along the left 2 edges of the paper). Then, turn the paper 1/4 turn and stamp again in the "new" upper left corner.

Locate the white heavyweight cardstock piece measuring 4-1/4" x 5-1/2". Stamp a teacup, marshmallows and the sentiment "Warmest Wishes".

Die cut the teacups, marshmallows, and sentiment. Use a Mini Ink Blender or cotton swab and some Distress Ink to ink the "beverage" inside the cup (depending on the color of your "same" paper, you may want to use a metallic pen, colored pencil or marker instead).

Adhere the marshmallows to one of the "same" teacups. Stamp the heart shape onto THREE of the heart die cutouts (from step 3). Move on to step 7.

7. Locate OC-2, the "light" paper, one dark rounded-edge rectangle piece, and a card base. Cut a 4" x 5-1/4" panel from OC-2.

Cut a 3-1/2" x 4-3/4" panel from the piece of light paper. LAY (do not yet adhere) the light panel on top of the OC-2 panel. LAY one dark rounded-edge rectangle vertically in the upper right portion of the light paper. Stamp the "dish" onto a small strip of the light colored paper and die cut out.

Discard the scrap pieces of light paper after die cutting. Since you are ready to die cutting with the "dish" die, locate the larger strip of OC-2 and cut 2 dish shapes next to each other near one long edge of the paper (do NOT stamp the dish). Adhere one of the teacups on top of one of the OC-2 dishes. Lay the cup and dish on top of the dark rounded rectangle. Experiment with the arrangement of this card. Choose a sentiment to stamp on the vertical bottom of the dark rectangle. After stamping the sentiment, adhere all pieces to the panel (use foam tape for the teacup, if desired).

Locate 2 of the STAMPED heart die cut shapes to use as accents. Adhere panel to card base with Maymay tape.


8. Locate DP-2, the teapot stamp, and the "Brewtiful" stamp. Stamp 2 teapots onto DP-2 close to one edge of the paper, and as close as possible to each other (leave room for the die to cut out the image!). Then, stamp the word "Brewtiful" inside each teapot. If desired, also add the stamp that reads, "You Are So" above the "Brewtiful".

Experiment with the look and feel of the stamps inside the teapot. Die cut the teapots.

Adhere one teapot to the card with the vertical notched strip (from step 4). Accent that card with one stamped heart die-cut shape and one NON-stamped heart die-cut shape. THAT card is DONE.


Adhere the second teapot on top of the diamond square card. Move on to step 9.


9. Fold, tear, distress and ROLL BACK the top long edge of the remaining piece of light paper. HINT: you may want to lightly spritz water on the paper for help. Ink, if desired. Do the same thing on the remaining piece of "same". And also do the same thing on the remaining piece of OC-2 (the piece with the 2 die-cut dishes).


Adhere all these distressed, rolled-edge pieces on top of each other. Trim to panel size (4" wide), keeping in mind that the "panel" you create here will only cover the bottom 2/3 of the card. The "rolled" edges will be like horizontal "stripes" across the top-folding card base.

Adhere to card base. Locate the dark cardstock small rounded rectangle.

Adhere horizontally to top-right of card. Adhere teacup and light cardstock dish to the dark rounded rectangle. Stamp teabag and spoon onto DP-2 and die cut. Adhere to teacup. Ink edges of card. Stamp sentiment on INSIDE of card, as desired.


10. Locate the card panel with the circle adhered to the bottom corner. We will be working with this panel in this step. Next, hand-tear DP-2 into the largest possible piece.

Trim that piece into 3" x 2" (or as large as possible).

Round the corners, even if there is a bit of cut-out in the piece. Adhere vertically to the top-right of the card panel (the rectangle will overlap the circle a bit). Next, trim strip of OC-2 into 3". Round corners. Locate the dark cardstock strip with rounded corners. Adhere that strip horizontally at the bottom of the rounded corner rectangle (it will overlap the circle AND it will hang off the right edge a little). LAY the OC-2 rounded corner strip underneath (and slightly RIGHT) of the dark cardstock strip, leaving about a 1/4" or so space between. Before you adhere, make sure the LEFT EDGE of the OC-2 strip lines up with the LEFT EDGE of the DP-2 rectangle above.
Adhere. Trim off the excess. Locate 4 die cut hearts and adhere them to the top LEFT space of the card. Allow the hearts to hang off the left and top edges, and also to overlap the DP-2 rectangle a little. Trim excess.

Adhere the OC-2 die cut dish on the DP-2 rectangle, just above the circle. Adhere the teacup. Adhere "Warmest Wishes" die cut sentiment below the teacup. Ink edges of panel. Adhere the panel to the remaining card base.


That's it! Congratulations! You started out with 11 sheets of paper and ended up with 5 AMAZING cards! That was EASY!
We would love to see your work! To get our attention, post your projects from this pattern using BOTH hashtags - #sandpaperroadcreates #maymaymadeit
Check out more Craft Outfitting™ patterns at sandpaperroad.com (and click on "Craft Outfitting").
Don't forget to FOLLOW the Sandpaper Road blog for lots more papercraft inspiration!