
Pictorial Designer Cindy has created a beautiful easel card that looks like it would take days to make,but she some great tips to help you out.
Supply List
• Solid Ribbon
• Decorative Mesh Ribbon
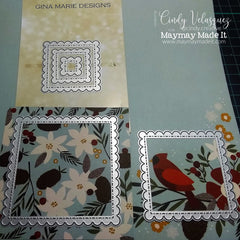
• Gina Marie Designs – Scalloped Nested Square Die Set
• Stapler
Directions
1. First go through and pick all the Designer Series Paper (DSP) that you will use.

2. Cut Solid Cardstock to 11” x 5 ½”.
3. Score Solid Cardstock at 2 ½” and 5 ½” then score.
4. Cut four DSP Base (three for the inside and one for the front mat)
1. (2) 5 ¼” x 5 ¼” for front mat and inside mat
2. (1) 2 ¼” x 5 ¼” for inside top flap
3. (1) 2 ¾” x 5 ¼” for middle flap
5. Adhere all DSP Bases to the inside of the card.
6. Cut one DSP to 1 ¼” x 5 ¼” and adhere to the inner mat base.
7. Cut one Solid Cardstock to 5 ½” x 5 ½” for the front of the card base.
8. Fold card in half add Art Glitter Glue to the 2 ½” inch exterior flap then place the solid card front on top. Once the glue dries it will fold when open to form the shape of an easel.
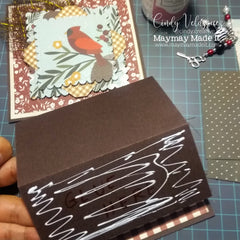
9. With the card folded in half and flat we will now work on the card front.
10. Adhere the DSP base mat to the card front.
11. Cut one DSP to 5” x 5” inches and adhere to the center of the front card base mat.
12. Cut a piece of Decorative Mesh Ribbon to 6” x 6” inches and fold diagonally then fold again on both ends then staple in the center to hold the shape.

13. Hot glue the Decorative Mesh Ribbon to the center of the card front leaving the trim exposed to your desired effect.
14. Using the largest Gina Marie Square Scalloped Die cut one DSP and adhere to the center card front with the Scotch Double Sided Foam Tape.
15. Cut one DSP to 3 ¼” x 3 ¼” then using the We R Memory Keepers – Angle Punch finish all four corners. Then adhere diagonally to the center front card base.

16. Using the second largest Gina Marie Square Scalloped Die cut one DSP then adhere to the center card front using foam tape for continued added dimension.
17. Create a small bow with the solid ribbon and adhere to the top center with hot glue.
18. Going back to the inside of the card stamp the inside lower right with the stamp sentiment.
19. Using the flower stamps from the stamp collection and Tim Holtz ink stamp the six flowers from two DSP then fussy cut the flowers.

20. Add double sided foam adhesive to two of the flowers. Adhere four flowers with Art Glitter Glue directly to the inner card base surrounding the stamped sentiment. Then adhere the foam backed flowers to the card base. The foam backed flowers will keep the card from sliding down when propped up.
21. With the Nuvo Aqua Shimmer add shimmer to all the flowers and any where else you might want to add extra details of shimmer.


22. Now you card is all done and ready to gift to someone special.
