
Focus on the Memories
Hi y’all! It’s Susan Lee Rose from @susanleeroseblog, here again to share this cute little card featuring the Focus on God stamp set from Maymay Made It. I love the cute little camera images! This stamp set is perfect for card making, but also for Bible Journaling, and documenting your travel. I also used the Slice of Summer 6” x 6” paper pad from Echo Park Paper Company, which is was perfect for this card!
Materials:
--Premium Cardstock Trio--A Slice of Summer Lunchbag Cardstock & White Cardstock https://bit.ly/3uUyCpL
--A Slice of Summer 6” x 6” Paper Pad https://bit.ly/2RwB207
--Focus on God Stamp Set https://bit.ly/2T4nYzl
--Snail Mail Stamp Set https://bit.ly/3psqF9Y
--MementoTuxedo Black Dye Ink https://bit.ly/3z42EL3
—Nuvo Creative Pens https://bit.ly/3g1etK8
—Memento Dew Drop Ink-Espresso Truffle~Desert Sand~Rhubarb Stalk https://bit.ly/3iu7awx
—Tonic Super Trimmer Paper Trimmer https://bit.ly/2T7gvzo
—WRMK Scoring Board https://bit.ly/3trEvKK
--Teflon Bone Folder https://bit.ly/3vroXsa
--MISTI https://bit.ly/3ipcu3W
--Cutter Bee Scissors https://bit.ly/3v0jgjB
—Bearly Art Glue https://bit.ly/3rUZHs4
--Bristol paper
Cut Guide:
--LunchbagCardstock | Cut 1 piece at 5.5” x 8.5”
--Lunchbag Cardstock | Cut 1 piece at 1.5” x 11”
--Green Dot | A Slice of Summer Paper Pad | Cut 2 pieces at 5.25” x 1-7/8”
--Plaid | A Slice of Summer Paper Pad | Cut 2 pieces at 1-7/8” x 2.5”
--Small Floral | A Slice of Summer Paper Pad | Cut 2 pieces at 5.25” x 1-7/8”
--Blue Solid | A Slice of Summer Paper Pad | Cut 1 piece at 5.25” x 4”
--White Cardstock | Cut 1 piece at 5” x 3.75
Directions:
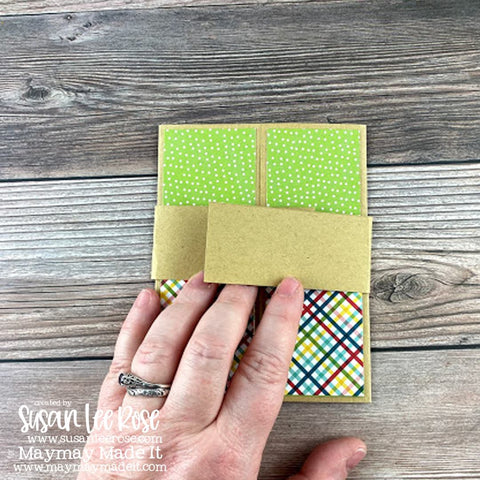
1. Cut out the paper according to the cut guide. Score the 5.5” x 8.5” piece of Kraft cardstock at 2-1/8 “ x 6-3/8” ( To create Gatefold Card Base).

2. Glue the plaid paper to the bottom of the green dot paper.

3. Glue the green dot paper to the front flaps of the card base.

4. Glue the small floral paper to the inside flaps of the card base. Then glue the solid blue into the center of the inside card base.

5. To make the belly band, wrap the 1.5” x 11” piece of Kraft cardstock around the outside of the closed card base to see where it needs to be folded. Make sure it is a little loose to make sure in goes off and on easily. Glue ends together and let dry.
6. Using the Espresso Truffle and Desert Sand inks, go around the edge of the belly band to make it look aged.

7. Using the Tuxedo Black Memento ink, stamp the camera image and color it in with alcohol ink markers. Stamp the “LOVE” sentiment with the same ink. Fussy cut out the camera and the “LOVE” sentiment. Attach the “LOVE” sentiment onto the lens of the camera image with double sided foam squares.

8. Attach the camera image to the belly band using double-sided foam squares.

9. Stamp the inside sentiment to the 5” x 3.75 piece of white cardstock. After stamping, glue the white cardstock on top of the blue paper on the inside middle of the card.
