
Hey guys! Check these really adorably stinkin cute cards! Today you will see Maymay use not 1, not 2 but 3 amazing techniques: dry embossing, coloring, and hold on to your hats ink dragging! So gather those supplies, a cuppa cuppa and let's create!
Supplies used:
Embellishments of your choice
Measurements:
~Cut your card base to 5 1/2 x 4 1/4, the standard A2 card size
~Cut your cardstock panel to what size you would like, we did ours at 4 x 5 1/4
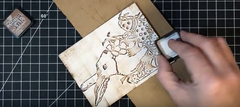
~Run your cardstock panel and embossing folder thru your embossing machine
~Then take your ink pad and do the " ink dragging technique
~Next you will color your embossed image with the medium of your choice, today we used color pencils.
**HINT** For a more bold look re-drag the ink pad over the embossed image
~ to give stability and a lil bit of lift add a craft foam sheet cut to the panel size
~Embellish
~Glue panel to the card base
Links to other ink dragging videos:
Please remember to head on over to our facebook group, Maymay Made It and So Did I:a place to share your Maymay inspired projects, and post your version of this fabulous project. You can also showcase your creation on the Customer Gallery to show us what you are making with the products you have purchased from our store.