
Maymay was challenged by Shirley Murray to create a larger paper purse using poster board. Challenge accepted! This purse is the perfect size for those Valentines and birthday presents. So gather up those supplies and let's take on the challenge and create!
Supplies used:
28 x 22 piece of poster board
Pokey Tool (AKA Kaiser Craft Die Release Tool )
8" dinner plate
Ribbon of choice
Measurements/ Instructions:
~1 piece of poster board that measures 28 x 22 inches. We used black, this will be your purse base.
~You are going to measure in from the sides 8 inches and make a mark, we made an arrow to be able to see it better, You will need to do this for all 4 sides. See the photos and the video.

~Next, you will need to fold all 4 sides from one arrow to the opposite arrow.... see the photos and video. This folding is the beginning of creating the " box base" of the purse.


~ Next you are going to cut along the score lines as shown in the photo and video to create that flaps that will be folded into the center to create the box shape.
![]()
~ We are going to decorate the front and back on the purse with pattern paper that measures 8 x 12 inches. You may need to trim the mats slightly, the folding may not be perfectly even. We did not decorate the side panels, but you can measure and cut mats to fit.

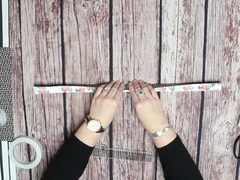
~ Next we are going to make the handles. You will need to cut 4 pieces of pattern paper at 2 x 12 inches. Score each strip at 1 inch. Take 2 of the strips and glue them together at one end so they overlap by approx. 3/4 of an inch too create a longer handle strip. Then fold 2 handles in half and glue them to get a stronger handle. See the photos and video for assembly of the handles and box section of the bag.


~ Now to create the closure... You will need to cut an 8-inch circle out of pattern paper. We use an 8-inch dinner plate and traced it out and then cut it to get our closure circle.


~We are using magnets to keep the purse flap closed. You will need to cut 2 pieces of coordinating pattern paper to measure 1 1/2 x 2 inches. These will be used to hide the magnets and make the closure look a lil cleaner. This is optional. You can use magnets or even velcro dots to close the purse. See the photos and the video for assembly.


Please remember to head on over to our Facebook group, Maymay Made It and So Did I: a place to share your Maymay inspired projects. We love to see your versions. You can also showcase your creations on the Customer Gallery, to show us what you are making with the products you have purchased from our store.
2 comments
Kathy M
(Insert drumroll) That is the most beautiful hand made paper purse I have ever seen! ♥
Mary Johnson
what would it be like if you took some round beads and glue them to the bottom and used it as when I call him legs or you know the metal things on the bottom of purses what do you think doing something like that